Showing posts with label tips. Show all posts

Tuesday, May 21, 2013

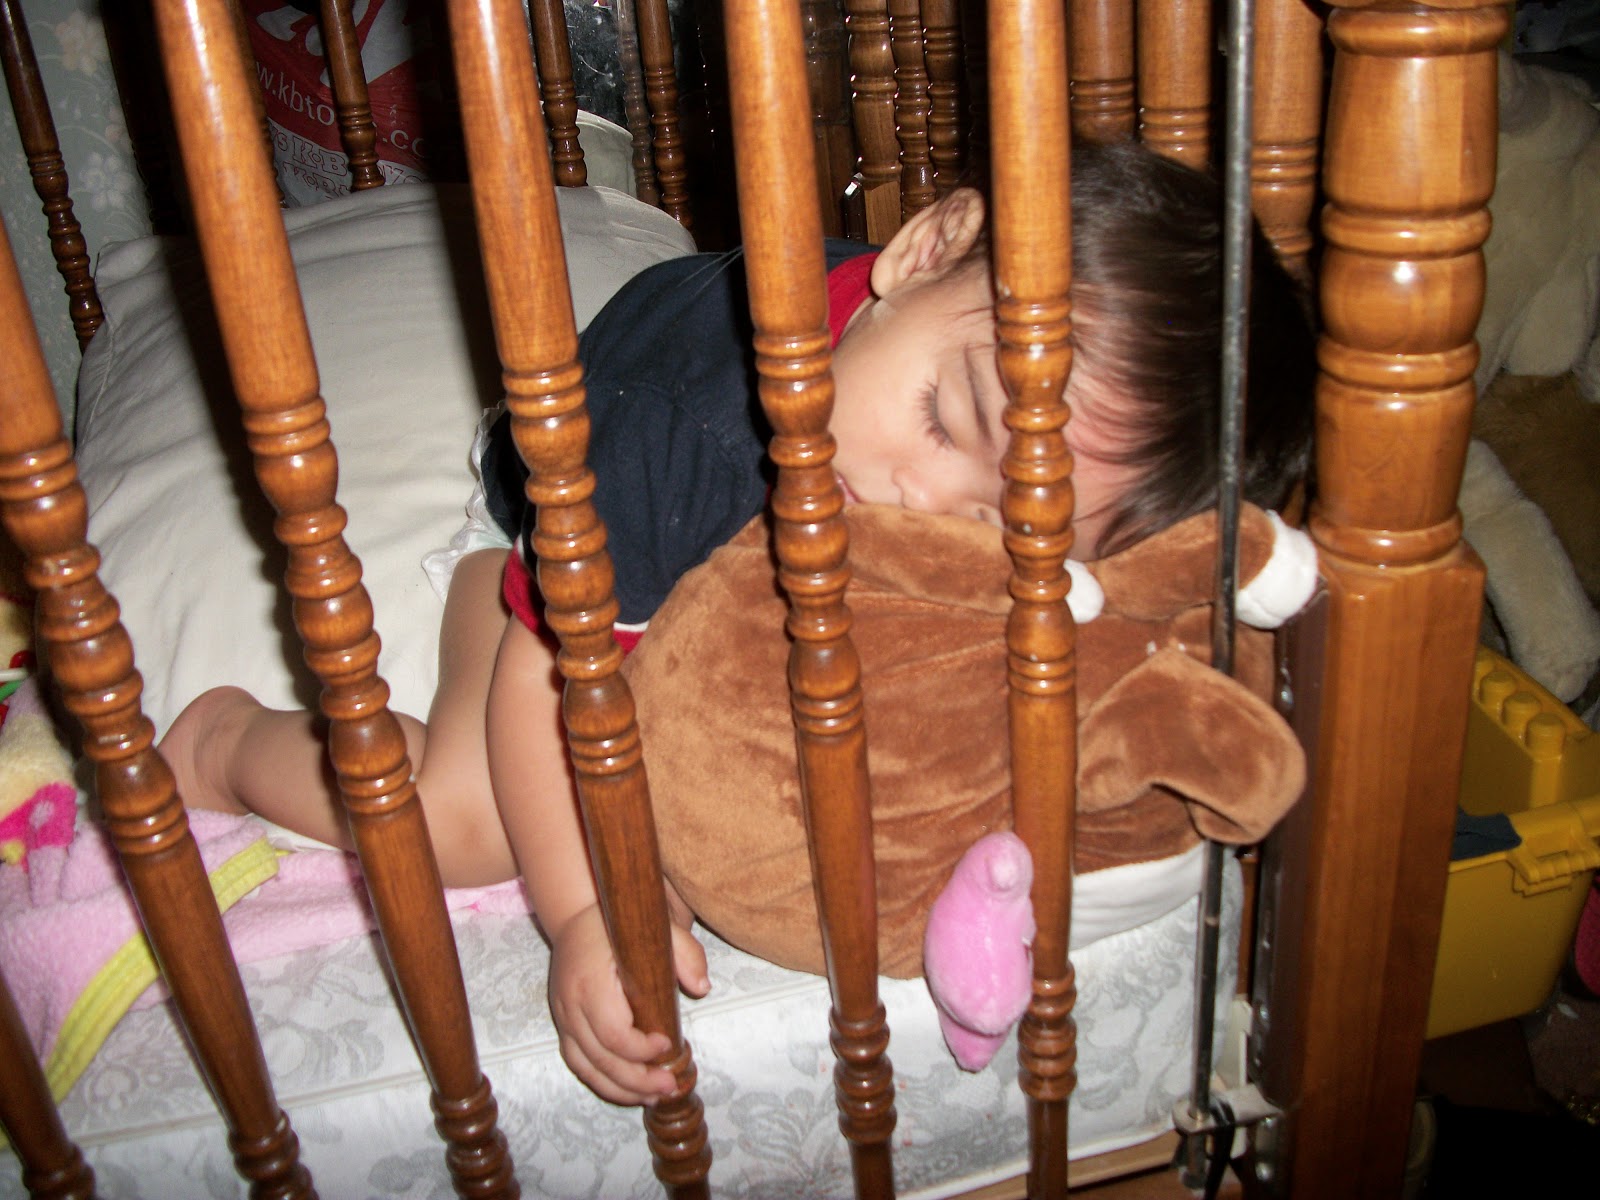
Can Sleep Be the Answer to Parenting Problems?


Many parent eventually reaches a point where they feel they need help. At this point many start with parenting websites and books. But new studies suggest a simple quick fix has again and again solved or greatly improved behavioral and school problems. And that simple fix is: sleep.


I can tell you first hand how much it actually will improve your life. My oldest had always been a difficult sleeper, but after sticking to a strict sleeping schedule I saw major improvements with in a couple of weeks. If you have a strong-willed child this is easier said than done but I promise that if you persist it will be worth it!

My first-born had always been difficult with an over all stubborn personality and had a very bad case of colic to boot. I was never really able to get her on a stable sleep schedule which in turn led to many sleepless nights for myself as well. Eventually her tantrums became a daily occurrence which only got worse once she started full-time kindergarten. She was having a hard time with her school work, homework became a daily battle, and she developed a hair-trigger temper.

Once I was able to get her to sleep (lights out for everyone was the only thing that ended up working) an additional 1 1/2 hours a day to a total sleep time of 12 1/2 hours. In a week all of her bad behavior lessened considerably. In two weeks we were able to get through homework easily and get her back up to grade level quickly. After two months most of the tantrums and issues were gone. Even I have seen improvement in myself with the additional sleep I've been getting.


Here's what the experts have to say:
Research of how much sleep children should get -
There is no magic number for how much sleep is needed since sleep requirements are individual. But here are the general recommended amount.

Newborns: 15-16 hours
1-12 months: 14-15 hours
1-3 years old: 12-14 hours
3-6 years old: 10-12 hours
7-12 years old: 10-11 hours
12-18 years old: 8-9 hours
19+ years old: 7-9 hours


What studies show could be the consequences of not getting enough sleep:
  • inhibit productivity
  • difficulty paying attention
  • reduce the ability to remember information
  • Greater chances of being involved in a car crash
  • Higher BMI due to increase appetite
  • Health problems such as diabetes, heart problems
  • Increase or worsen psychiatric conditions including depression and substance abuse
  • Worsen ADHD symptoms
  • Sleep deprivation can sometimes be mistaken with ADHD
  • While adults become sluggish when sleep deprived, children speed up


What can improve when you get enough sleep
  • Lessen ADHD Symptoms, one study found that symptoms were eliminated in some children
  • Improves your brain power
  • Clearer thinking
  • Helps keep your heart healthy
  • Reduces stress
  • More alert
  • Boost memory
  • Helps protein molecules make repairs in your body


Studies between children that get enough sleep vs those that don't

In 2006, one study observed that children 6-15 years old with sleep problems were more likely to be inattentive, hyperactive, impulsive, and display defiant behaviors.
 
In one study done by UVA found that sleep deprived children are more likely to snore and toss in bed. Test scores were also worse compared to children who did get enough sleep. The level of impairment in sleep deprived children was comparable to children who had been exposed to lead.

Some scientist believe that sleep apnea as an infant or toddler significantly raised the chances of the child developing ADHD. Additionally, some believe that sleep disorders in young children may be a direct cause of some ADHD cases.


What parents should do:
consistent sleep schedules, even on weekends
keep sleep stealer's out of room (ex. TV, cell phones, computers,)
Finish eating 2-3 hours before bed time
establish a bedtime routine
avoid caffeine close to bedtime
make sleep a priority
talk to the child's pediatrician (under Dr supervision many parents have seen improvements with certain vitamins or a melatonin supplements.)


Conclusion/Personal Thoughts

The lack of sleep can become a vicious cycle. Sleep deprived children can still display symptoms well into the next day which can cause additional sleep problems. One thing that worked for me was the lights out method. This means that all lights, TVs, music players, computers, cell phones, EVERYTHING needs to be turned off and everybody needs to be in bed. If the child cries or complains, it's ok. I personally did not ignore my daughter when she cried but I also didn't turn on any lights or even say anything. I just sat down or laid down with her until she fell asleep. Eventually I was able to get to my bed faster each week.

Honestly, I did get resistance from my husband who was annoyed by it. But after much insistence (aka nagging) I got him on board. The temptation of a TV on in another room was too much for my daughter which caused her to stay up so there really was no room for negotiation.


I hope that this helps <3>
Resources/ Reccomondations:
http://kdvr.com/2012/10/16/study-tiny-changes-in-how-much-sleep-kids-get-have-major-impact-on-behavior/
http://www.sleepfoundation.org/article/sleep-topics/adhd-and-sleep
http://www.sleepfoundation.org/article/sleep-topics/children-and-sleep
http://www.newsplex.com/healthwatch/6689447.html
http://www.babysleepsite.com/tag/sleep-study-results/
http://serendip.brynmawr.edu/exchange/node/1690 (Additional links at the end of article)


Tuesday, March 26, 2013

Discount Life Subscription to Red Apple Reading (Updated 8/2/13)

I just wanted to pass this along.


MammaSource is offering a 77% off deal to a lifetime subscription to Red Apple Reading. It costs $39 for up to three kids ($10 for each child after that.) The recommended ages are 4-7. This expires five days from today (3/26/2013). Here is the link: http://deals.mamasource.com/deals/red-apple-reading?sdtv=a&sl=a&utm_campaign=4202&utm_medium=email&asid=7161584&utm_source=deal_alert


I've seen first hand that learning programs like these really boost a kids learning. My  own daughter has been using an online math program called Reflex and it has done wonders in a very short period of time.

Also try http://theteacherscafe.com/ the learning sites and games here are free (at least the ones I've clicked on) but the quality of the games aren't as good as Reflex, but hey it's free!


*Updated 8/2/13* MammaSource is offering the same deal again and expires in 5 days
http://deals.mamapedia.com/deals/red-apple-reading-july-2013?sdtv=a&sl=a&utm_campaign=4388&utm_medium=email&asid=7161584&utm_source=deal_alert


I am not making any money on this, I just thought this was a good deal and wanted to pass it along.

Saturday, September 22, 2012

How To Get Rid of Urine Odor from Carpet

So lately I've had some pee pee trouble. For a multitude of reasons my potty trained 5 year old daughter started to pee in her room. Her reasons ranged from being lazy, upset, and she left a shirt full of food on the bathroom floor that ended up covered in ants so she didn't want to go in there. Mind, we have two bathrooms in the house. Mostly, I think it's because she's upset at me and jealous of her two younger siblings. To top off my pee pee troubles my cat started to pee in her room too. And anyone one who owns a cat knows that cat urine is extremely difficult to get rid of and most commercial products don't nearly work as claimed.


So here is how to get rid of urine and the odor from carpet:
 
Since once the pee enters the carpet it actually spreads deep into the padding under neither the carpet so hand held sprays won't work. Both techniques will work for spot treatments, but if you can't pin point the smell then do the entire carpet. I personally use and recommend using both starting with the vinegar first then the baking soda the next day.


Vinegar Mix Cleaner:
 
  • In a large bucket mix a 1 to 1 ratio of vinegar and water (boiling hot water is recommend for very stinky carpet.)


  • Liberally soak the carpet and let sit for about 10 minutes.


  • *Optional* Add any carpet cleaner of you choice (I like to use one with a strong floral smell) using a carpet shampooer. This helps mask the vinegar smell.


  • Pick up as much of the mixture as you can with either a carpet shampooer or a wet/dry shop vac.

  • Let the room air out. Once the carpet is dry the vinegar smell will go away.


Baking Soda/ Hydrogen Peroxide Mix
 
  • Spread baking soda over the entire carpet generously. Break up any clumps by hand and sprinkle over the floor.
 
  • Work into fibers with a cleaning brush
 
  • Let it sit over night.
 
  • Mix 1 teaspoon dish soap (non-bleach) for every 1/2 cup of hydrogen peroxide
 
  • Spray or pour over baking soda (you don't need to soak the carpet like with the vinegar mix)
 
  • Work it into the carpet using a cleaning brush or toothbrush.
 
  • Let it completely dry
 
  • Vacuum it up with the upholstery attachment.
 
  • *Optional* After I like to spray a light layer of Fabreez for a nice floral sent.

*Warning!* I have no idea why but if you have a roach problem (even a mild one) they might be attracted to the baking soda & hydrogen peroxide mix. So spray the out side of the house completely with a roach repellent so they don't get in. I don't know if it was a one time thing but this did happen once to me when I left a window open over night (I actually saw them crawling through the window to get in!) However, this never before or after. Maybe the neighbors were fumigating? I don't know but I though I should warn you anyway.


Using this really helped. My daughter's room smelled really bad since she would pee at different spots and not say anything. The cat didn't help either.
 
I recommend buying the vinegar, baking soda, and hydrogen peroxide in bulk at either Sam's Club, Costco, or Smart & Final (this one doesn't require membership).

Thursday, April 12, 2012

Stop Bullying Now, Pt 1: Statistics


With another school year coming to a close it's time for students to look back on their school year. With the statistics above it's likely that your child has been bullied, bullied others, or witnessed bullying at school.

I'll be posting a series of posts and links on the topic of harassment from both sides. The victim and the aggressor.


This post is meant as food for thought. Here are some additional statistics on the topic of bulling.


Bullying occurs at the same rate among special needs students as with regular students.

Only 36% of students will notify a teacher or adult of being bullied.

According to Professor Jamie M. Ostrov, "... frequent relational and physical aggression can begin as early as two and a half years of age and may be a relativity stable behavior during early childhood." 


Psychologist Dan Olweus of the University of Bergen in 1993 found that 60% of children in grades 6-9 that have regularly bullied others ended up having at least one criminal conviction by age 24.


Chronic child bullies are likely to maintain their behaviors into adulthood and diminish their ability to sustain positive relationships.


160,000 children skip school every day in the U.S. in fear of bulling according to the National Education Association.


20% of students are victims of chronic bulling from kindergarten through 6th grade.


According to Mark Dombeck, Ph. D. the effect of bulling include:


   "In the short term:
  • Anger
  • Depression
  • Anxious avoidance of settings in which bullying may occur.
  • Greater incidence of illness
  • Lower grades than non-bullied peers
  • Suicidal thoughts and feelings (In one British retrospective bullying experiences survey I came across (of unknown scientific value), 20% of the sample attempted suicide secondary to having been bullied, whereas only 3% of participants who were not bullied attempted suicide).
   In the long term:
  • Reduced occupational opportunities
  • Lingering feelings of anger and bitterness, desire for revenge.
  • Difficulty trusting people
  • Interpersonal difficulties, including fear and avoidance of new social situations
  • Increased tendency to be a loner
  • Perception of self as easy to victimize, overly sensitive, and thin-skinned
  • Self-esteem problems (don't think well of self)
  • Increased incidence of continued bullying and victimization"


References & Recommendations:


Thursday, February 9, 2012

Why Seedlings Fall Over Pt2


There are two main reasons for young seedlings falling over. Not enough sunlight and damping off. If they are flat on the soil then they won’t survive, however, if they are slightly leaning over they might be savable.

Tall skinny seedlings that suddenly start toppling over are often called ‘leggy.’ The culprit it lack of sunshine. Placing seedlings near a window doesn’t always provide enough direct sunlight. This can even happen under growing lights if they are not placed close enough to the plants. Many plants need six to eight hours of sunlight.

If placed near a window it is important to rotate the plant every couple of days to prevent leaning. By not rotating it will cause some parts of the plant to not receive enough light. When a plant leans too munch it can weaken the stem which will lead to a leggy plant. Also, make sure that the plant is watered evenly so the roots will expand evenly around.

Damping off is a fungal condition that occurs with high moisture, humidity and low air circulation. Once a plant is infected it is unlikely to recover. The best way to prevent it from happening is to use a sterile well draining potting mix, fresh water, and sowing seedling thinly. Providing good air flow is important as avoiding excessive watering.

Too see what it looks like for seedlings damping off click here.

Constricted root growth can also cause plants to lean over. As long the plant isn’t completely flat then it might recover, however, the plant may have stunted growth. Repotting in a larger pot may help but it may not be worth it.

Did you bury the seed deep enough? Sometimes the solution is as simple as making sure the seed is covered deep enough.


Resources/ Recommendations: 


Looking for another blog to read? Check out: http://ramblings-rlsecor.blogspot.com/
She has some pretty neat stuff on her blog, check her out =)

Monday, February 6, 2012

Seedlings Falling Over?

One of the most disappointing things that can happen to anyone starting seeds indoors is to have those poor little seedling topple over. It is pretty sad since they look like they could be saved but deep down you just know that they're gonners.

While there could be a number of issues that could have cause its untimely death, the most common error is ventilation.

Most people think that they just need air but there is a tad bit more to it. They need fresh circulated air. You need actual air flow and not stagnant air which is common indoors. Flip on the ceiling fan or place a portable one in the room your starting the seeds in.

This can happen during transplanting and hardening off too. This is why I always suggest using fans and a sunny window (or growing lights if you prefer) to start hardening off your plants indoors first once the seeds have sprouted.

I'm personally not a big fan of starting seeds indoors simply because I'm too lazy and prefer direct sowing. But from experience if you're going to put an effort to starting seeds indoors, do it right the first time or you'll risk having mass casualties on your hands.

So here are some tips for good start:

~ Use a potting mix especially for seedlings!

~ Research the growing instructions for that exact verity of plant. Sometimes those packet labels aren't enough. Just search for "Growing __(type of plant)__ from seed" and you'll find some helpful tips from fellow gardeners on the internet.

~ Make sure your pots have drainage holes.

~ Don't forget to water! For best results water from the bottom, not on top. (If watering from the top then water gently.)

~ Keep an eye on those roots! Keeping seedling in a small pot too long can cause stunted growth.

~ Make sure you have good air flow. If you're using anything to cover the pot to create a greenhouse effect then make sure to uncover it once the seedlings have sprouted; they are for germination only.

~ Sunlight! Once the seeds have sprouted make sure they are getting enough sunlight. (Please note that some seeds need sunlight to germinate, always check growing instructions.)

~ Get the right temperature. Make sure that the room is the right temperature for germination and growing.


UPDATE: Part 2 on why seedlings fall over with more details as to why.


Blog of the day =)

Check out http://claudsy.wordpress.com/ I think the blog is well written and I just so sucked into her posts that I had to give you guys her link. She so far seems to be following the prompts from NaBloPoMo no relatives.

Sunday, January 29, 2012

Plant Profile: Burpee's Fordhook Zucchini

Name: Burpee's Fordhook Zuccinni

Botanical Name: Family: Cucurbitaceae Genus: Cucurbita Species: pepo

Zone: 3-12

When to Plant: Plant after last frost

Sun: Full

Sow: Direct Sow

Planting Depth: 1inch

Spacing: 36 inches

Germination: 4 - 11 days

Maturity: 57 Days

Height: 34- 40 inches

Spread: 18 inches

pH Range: 5.6 - 7.5

Yield: High yielding plant

Description: Hybrid developed by Burpee which produces black/green stripped zucchini. This bush plant produces broad dark green leaves.

Harvest: For full flavor harvest when the fruit is 7 to 10 inches long.

Seed Saving: Seed saving is not recommended because this plant is a hybrid so seeds saved may not produce plant with the same quality as the parent plant.

Growing Tips: Add fertilizer just as the plant starts to produce fruit to increase production.

Problems: Squash bugs, aphids, squash vine bores, powdery mildew

Author's Notes: This is a must have for new vegetable gardeners or anyone looking for an easy high yielding summer squash. This was one of the first vegetables that I ever grew, which is odd since at that time I hated zucchini. But I grew it and I was determined to eat it. And boy was I surprised! I now officially love zucchini and this plant proves the old vegetable gardener's saying "If you haven't grown it, then you haven't really tasted it." Store bought zucchini has nothing on this supper tough plant.

Back then I figured you just stick seeds in the ground, add water, then watch it grow.  When every thing else died, had stunted growth, and didn't even produce anything; this guy marched on. It grew even in poor soil, no fertilizer, as well as ofte forgetting to weed and water. Even though I did everything wrong my three hardy plants produced enough fruit for one to two meals a week until the frost killed them.

Recipes:


Sauteed Zucchini


Zucchini loaf bread


Grilled Zucchini


References/Recommended Sites:

Burpee.com: Fordhook Zucchini Summer Squash

YouTube.com


Saturday, January 28, 2012

52 Week Challenge - Week 5 Chest Freezer

Ok, to keep from repeating myself too much please refer to my last 52 Week Challenge post for how to defrost a freezer.

Here I'm going to work on a chest freezer.

So as you may be asking yourself. Do I really need to defrost the darn thing? Apparently yes, according to various manuals and manufacture websites they need defrosting every one to two years. Why? It's actually an efficient issue. When it's caked up in ice inefficient and uses more energy.

During this time it would also be a good idea to remove the dust from the coils in the back. The hose attachment part of the vacuum can be used for this. MAKE SURE THE FREEZER IS UNPLUGGED FIRST. Don't want any accidents now do we?

Anyone who owns a stand alone freezer knows that it is nearly impossible to organize and keep it that way unless you're an overly detailed & organized person. Which I am obviously not. Part of what makes it such a pain is that you have to reach down deep to get what you want sometimes. Then when things get shifted around until something gets buried. Then your left with that odd question of "Exactly how long has that been in there? I don't even remember buying it."

Many of the newer ones come with baskets but your still left with the task of removing the top ones then bending over the edge because what you really want is always on the bottom.

Another option that's all over the Internet forums is using bags. Here's one that has some good ideas. Some say thick trash bags work good and others recommend those recyclable shopping bags. With this system you can easily lift out the bag without having to needlessly submerge yourself into the freezer to get what you want.

Another pretty good idea what to rotate what you have in there. Its easy, just put all the stuff that was on the bottom on top.

Some claim keeping an inventory works for them. I don't think this is something that would personally work for me but it might for you.

Saturday, January 21, 2012

52 week challenge: Week 4 - Freezer

Enter week 4 of my 52 week challenge!

So if you have read the post on my refrigerator you have a good idea of what my freezer would look like. Ya, I'm not even going to deny it.


So here are my cleaning tips on cleaning a freezer. I know I'm so friggen awesome!

*Tips* How to clean your freezer!

Most newer refrigerator/freezer combos do not need to defrost but if yours does plan and give yourself plenty of time.

Remove all the food and toss out anything that has been in there longer than a few months. Even in the freezer food can lose flavor and get freezer burn. Use your best judgement on this.

Place all the good food in either the refrigerator or a cooler.

Bring up the temperature for the freezer or unplug it if you don't have that option. If it needs to defrost then your better off turning it off and wait for the built up ice to melt.

Start off my cleaning the drawers in the sink with warm water and dish soap. Even if you have a freezer that doesn't need to defrost I recommend to clean the drawers first and allow the freezer to defrost because sponges and cloth with stick the frost on the walls.

Wipe down the walls with a cleaning solution then wipe down with a dry paper towel to dry.

Make sure that the drawers are dry before putting them back to prevent frost built up.

Once you're done set the temperature back. Keep in mind that the colder the food the longer it will keep. According to refrigeration-repair-tips.com, set it to 0F.

Sunday, January 15, 2012

Saving Money With Gift Cards?

I've heard people buy discounted gift cards to save money. Ok, ... but does it really work? Like for everyday life not just on splurging every once in a while. But more importantly is it easy? I'm not one of those coupon crazed people who somehow find ways to get free food and shop at multiple stores. I'm too lazy, unorganized and un-devoted for that stuff.

So far my husband is iffy about it. Last month I bought a Micheal's gift card about $4 off. It wasn't much but I bought my kids extra paint out of it. So with a fresh start at a new year I'm thinking what the heck? Maybe a lazy procrastinator can save a few bucks! Lord knows I need to.

This past Friday I bought a $100 gift card to Walmart for $98. $2 off, not much but hey it's something. If you didn't know, Walmart cards are usable at Sam's Club (where I plan on using it).

I will also be adding a whole page dedicated to this giving tips, links, and what not. Click here to see it! So what am I trying to say about this? If it works for me, it'll work for you. I shall be your test dummy for this =)

F.Y.I. I am not being paid to advertise for any of this. I think that this might be a good way to save money and I wanted to share it with everyone.

Saturday, January 14, 2012

52 Week Challenge - Week 3: Refrigerator

I am now entering week 3 of my 52 Week challenge and so far I am on a roll!

Cleaning out the refrigerator is one of the most important places to clean. But if your anything like me it just ends up a heaping mess before it actually gets cleaned. It's amazing how it just builds up like that! I swear I cleaned out a month ago. I don't know why but I dread cleaning anything in my kitchen. It's my no-go zone. I swear that there is some sort of force field that as soon as I hit with in a certain range suddenly my brain gets hit with a thought laser that make me remember 'hey wasn't I supposed to finish that over there in the other room?" or "Oh what's in the pantry?" or "I can always do this later." or "Why I am I even in here? I'm not even hungry - oh look cookies!"

So here is the result of my procrastination.


Here is close up of the disaster.


Any hoo, the best way to clean out a mess like that it take everything out and clean the whole thing out. Place anything that can spoil quickly like meats and milk in a cooler. Turn off the light and raise the temperature to get started. Instead of cleaning around everything it's best to remove all the shelves and clean them in the sink (especially if you can't remember the last time it was cleaned like this). Dish detergent works pretty well at getting everything cleaned. Remember to clean the insides and not just the shelves. Once everything is cleaned wipe down everything again a second time with a clean cloth or a sanitizing solution. Once it's done turn the light back on, lower the temperature and place all the (good, non-expired) food back in.

So from now on I pledge to clean out my fridge once a week,hopefully.

*Tips*

To prevent odors leave a small box of baking soda open inside.

Keep the temperature between 35F to 45F, but ideally it should be kept at 40F.

Leave a marker (non-permanent) in the kitchen to date when left overs are placed inside.
Cooked meat and chicken will last about 3 to 4 days. However, if it's fresh it will only last about 2 days.
Remember if it smells funny, throw it out!

If you're looking for a general guideline one how long food will last in the refrigerator go to http://www.realsimple.com/food-recipes/shopping-storing/food/how-long-food-last-00000000002738/index.html

Saturday, January 7, 2012

Mommy Tips: Diaper Rash

Need to know what to put on a diaper rash? Of course there is a mountain of creams and powders available but there are also other options that work just as well and sometimes even better. So if either creams aren't working or you don't have any on hand try one of these tried and true tricks.

1.) Cornstarch Baby Powder: For preventive measure I recommend using baby powder that is pure cornstarch. It absorbs well and actually helps heal broken skin. It is important to remember not to pour it into the diapers near the baby. I usually pour a little it into an open diaper before changing the baby. If you don't have the baby powder version plain old regular pure cornstarch will do.

BUT if the baby has a yeast infection the rash will get worse. If it does get worse try using an anti fungal cream a.k.a. jock itch cream (no joke) with an active ingredient of miconazole. This is what my doctor recommend and is available over the counter. If it doesn't start working with in 1-2 days take your kid to their pediatrician. Here is what a yeast infection looks like on a baby (don't worry it is not graphic and doesn't show a baby's private area, it just shows a patch of skin) scroll down to see the picture.


2.) Water Instead of Wipes: After having my third baby a nurse recommended to clean the baby's bottom in the sink instead of using wipes. A baby's bottom is sensitive, especially after birth and baby wipes can actually cause irritation. After rinsing the baby's bottom just pat dry, put on any creams if necessarily and put on a fresh diaper. Do this until the irritation does away. If your comfortable handling the baby you can bring her right to the sink and rinse her bottom with luke warm water. If you're not comfortable doing this then either use a squirt bottle or a warm wet wash cloth.

3.) Go Nude: For persistent painful diaper rash it is best for a baby not to wear a diaper at all. Let the baby's bottom soak in shallow warm water. If the baby still has an umbilical cord just take extra care not to get it wet by keeping the water shallow and place a dry wash cloth on top to prevent it from getting wet. After letting the baby soak for a few minutes then allow the baby to stay bottomless. To prevent a mess use a water proof baby mat with a soft blanket.

4.) Cloth Diapers: If you need to place some sort of diaper then use a cloth diaper. The fancier ones are easier to put on but more expensive. The plain white basic cloth diapers work just as well without the water proof cover. Just remember to place the baby on top of a water-proof mat or thick blanket if you don't end up buying the water proof cover. To see a video on how to put on a cloth diaper click here. This is a great video that shows how to put on different types of cloth diapers. Keep in mind that a baby can still get diaper rash with a cloth diaper. But when a diaper rash is sensitive to the touch I have found that a cloth diaper helps.

5.) Baking Soda: Give your baby a soak in shallow water mixed baking soda. I haven't tried this one but so many moms swear by it that it is worth a try. The amount of baking soda needed will vary depending on whom you ask but most recommend using a generous amount.

6.) Limit the fruit! There are foods that cause diaper rash. Too much fruit, especially citrus, can pass through the intestines not completely digested and cause irritation. If the baby is old enough, keep giving her fruit, just cut back a little and change the diaper more often.

7.) Breast Milk: Again, this isn't something I have tried but many women swear that breast milk cures diaper rash. They recommend that you lather the breast milk on the irritated area after diaper changes.

If the diaper rash doesn't go away consult the baby's pediatrician to rule out a possible infection.

Friday, January 6, 2012

52 Week Challenge - Week 2: Small Pantry

Now I am in week two of my organize home challenge. I have a small pantry that I keep 'locked' (I'm renting so I use bungee cords so my kids can't get in). I do recommend keeping some sort of locked cabinet for strictly adult, work, or school foods. My two and five year-olds have no self-control when it comes to some things and so do many other kids their age. So I don't run out by the end of the week I keep sodas, coffee, Snapple and my daughter's juice drinks for school on lock down. I also keep all my baking items and stuff that needs to be put in containers in there as well (rice, beans, etc.). On the lower section I have all the baking stuff and the upper shelf has all the work/school stuff.

I've also set to organize my cleaning supplies cabinet that it located above it that it out of reach. I am slighty ashamed at how many empty spray bottle I had up there. So from now on I'm only buying the large gallon size cleaner so I can just reuse the spray bottles.

*Tip* I actually place all my cleaners on a highest cabinet. I know many people place the cleaners in the cabinets under the sink but I think that idea should be rethought. It makes it too easy for young kids to get into. Child safety locks can sometimes be misleading. So far my two oldest children have found a way around every single type I have bought so far. It's better to be safe than sorry.

Monday, January 2, 2012

Weight Loss Challenge

These past few months I've found out that I like online challenges. I am doing the 52 week challenge but now I have decided to join another! It's called the iVillage Kick Start Your Weight Loss Community Challenge. It starts today so join up with me and let's get healthy together. It is a 6 week-long challenge to lose up to 15 pounds by Valentine's Day. After that I plan on going back to my pre-baby routine of working out 3-4 days a week.

*Just another tip* I don't know if it's just me but all those cardio work out DVDs showed very little results. BUT what worked wonders for me is yoga and Pilates. After having my first baby I took a yogalates class at a local community college. In only one semester 2 x's a week I lost all the post-baby weight. Not just that but I felt great both physically and mentally. That's something I never felt with other fad work outs. So if you don't like jumping around or get too tired to even finish a cardio work out try out yoga. Remember to start easy and don't worry of you can't do a position perfectly. That takes time and just do a modified version and only go as far as you can.

You don't really need all the fancy gear either. If you have a carpet area that will work fine. Also, a lot of work out videos are online on Youtube. Later on I'll start posting recommended beginner videos. Just as a little warning is that a lot of main stream 'beginner' yoga videos are actually really hard. So if you plan on buying a DVD look at online reviews first to get an idea of what you're buying.


Wishing you all the best on achieving your New Year's goals,

Vanessa

Saturday, December 31, 2011

52 week challenge: Week 1 - Pantry

So as part of my goal to actually organize my house I'm starting the 52 week challenge. For the first few weeks I am going to work around the kitchen area since that is what my husband complains about the most. I don't blame him. I have a VERY bad habit of putting things just about any where and claim to have 'put it away.' I think this is how the disorganized thing starts with me. Poor hubby, he is the organized one. So between the kids and me not putting things back where the should, he didn't stand a chance.

So this week I'm starting with organizing pantry. As of now I'm almost finished. I've even mapped out a plan on where everything should go. My kitchen pantry has six levels. As of now I'm basing where things go considering on what my kids like to grab and destroy.

The top-level will be cereals and large boxed items. Second juice, powdered drinks, and sweets. Third small boxed items. Forth canned goods. Fifth non-food items like ziplock bags, ect. Sixth fruits, veggies, and anything else healthy. I recycle so I'm reusing some shipping boxes from my online christmas shopping to place on the floor of the pantry. I like to keep a well stocked pantry, so hopefully it will stay nice and tidy.


Just some tips ...

My two-year old son  and my five-year old daughter like to grab food when they want. They have developed a habit of snacking all day. They get it from their Mommy. So in a very easy no effort way to get them to eat a little healthier, only healthy food will be with in reaching distance from now on.

I got this idea from one of my favorite people ever. Her name was Jennie, she was a foster parent to many children. They would often praise her for getting kids to lose weight and become healthier. She never put them on a diet and really let them eat whatever they wanted when they wanted. The catch? Only healthy foods in the house. She would always buy unhealthy snacks, but very limited. So once it was gone, it was gone. She only shopped once a week so usually all the sweet processed foods were gone with in the first couple of days.

I would really recommend this tip to anyone who wants to lose weight. I'm not saying don't buy unhealthy foods, just buy less. Then replace the rest of the amount you would have bought with stuff from the fruit & veggie section of the grocery store. This tip, however, only really works if you do most of your own cooking and eat out only two times a week or less. There is a lot of recipes online that include videos. Don't forget YouTube, I've been able to find great recipes on there too!


Wishing you all a very happy new year,

Vanessa